How to keep your desktop organized

Specifically, this post explains how to write a program that will run once every week, moving all of the files off the desktop and into a notated and dated folder in My Documents. I'm going to do this all with the programming language C# only because that is what my employer uses, but this is very similar to how you would do it in C++ or Java. I'm also only doing this for Windows 7 because that's what I use. But, you can do everything below for free, and you can download the finished C# code file at the end, which can be compiled and run with only minimal editing to change filepath names. This post is written for the absolute beginner programmer.
The first thing you need is an Integrated Development Environment (IDE), which is just a piece of software that helps you write code. We will use Visual C# 2010 (the express version can be downloaded for free here, and is sufficient for our purposes). I'm only using 2010 because this is the version my employer uses, but the version isn't important.
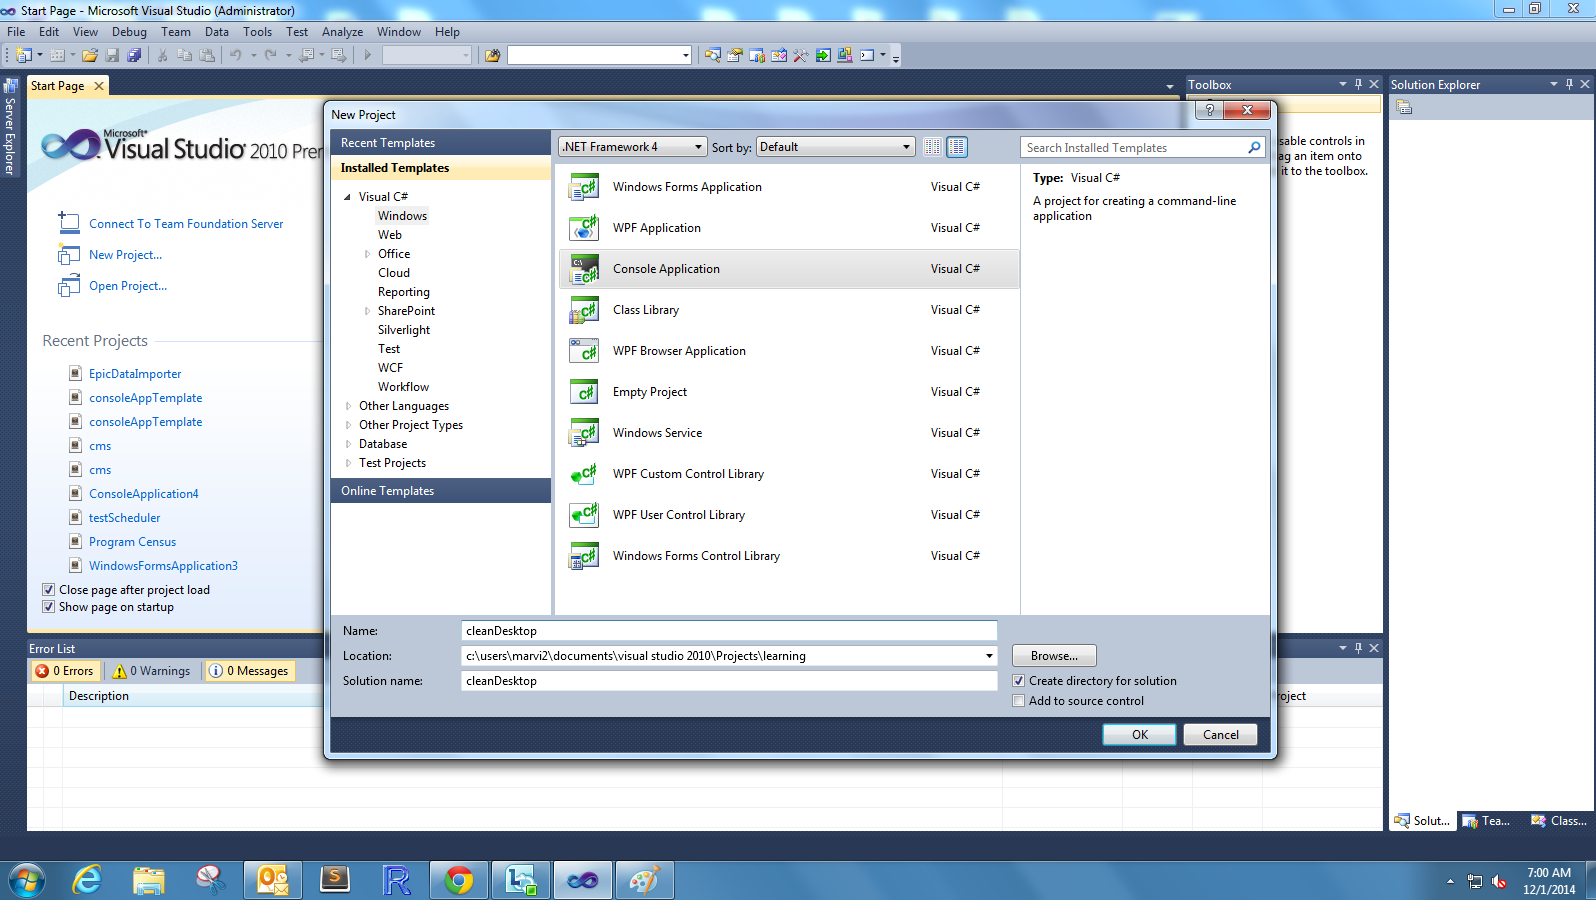
When you open Visual Studio go to file->new->project, which will take you to this screen:
Once it's done generating your "solution", you'll see this:
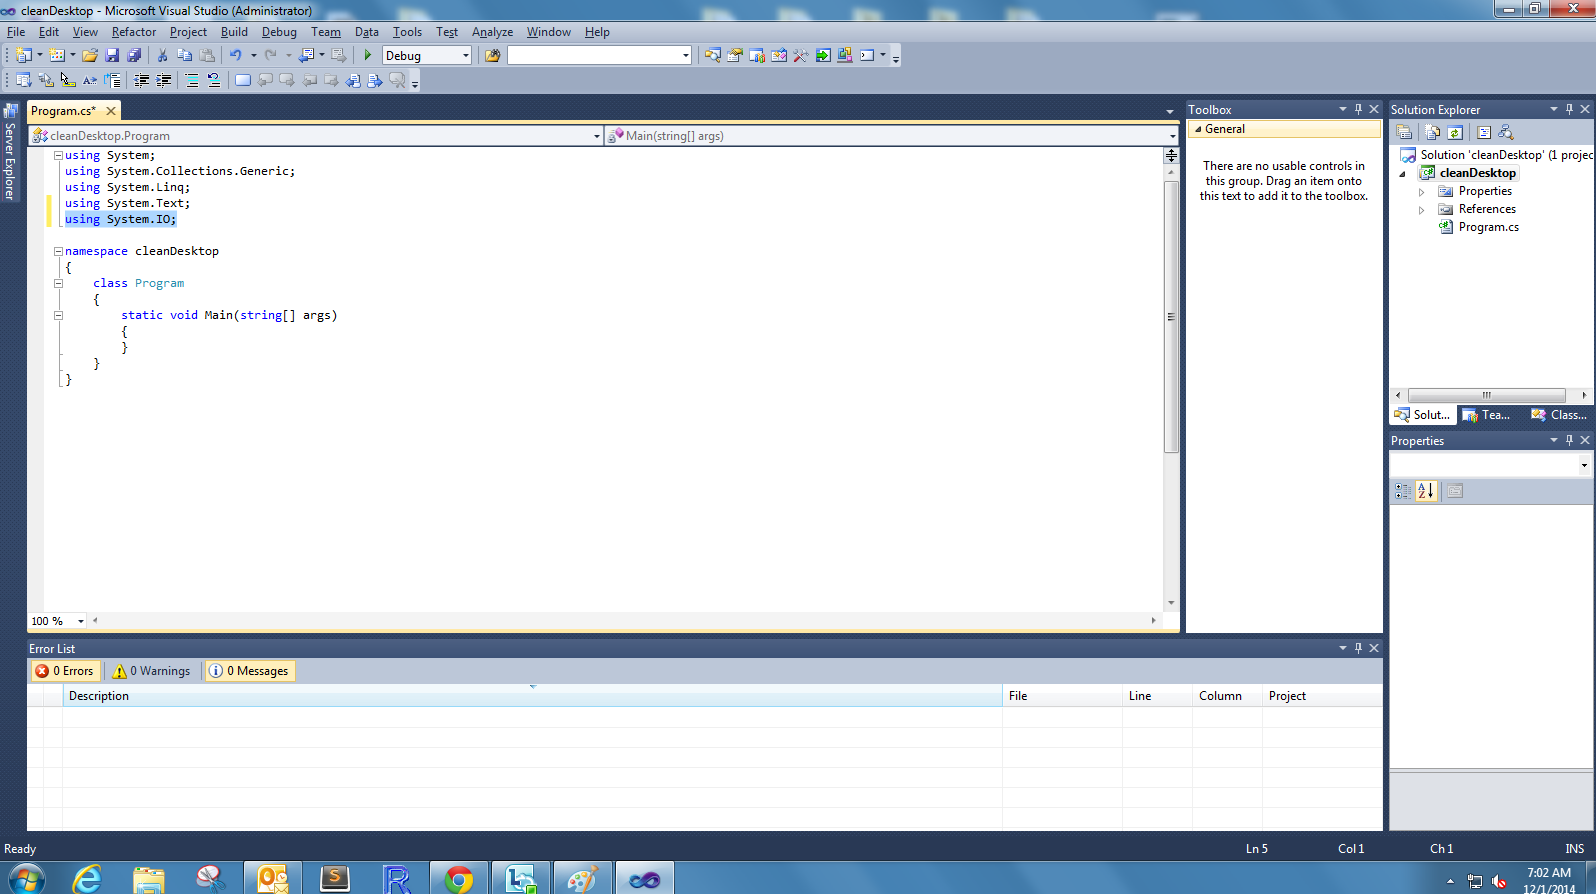
A note on terminology: technically there are no functions in C#, unlike in C++. Instead, everything is done with "methods" which are really just functions that exist inside classes. A class is a grouping of variables and methods that, together, define a "type" of object used in the program. The "static" keyword lets us access things stored inside a class without creating an "instance" of that class. See here for more about "instances" but for our purposes everything will be static, and will take place inside the "program" class. The keyword "void" tells the compiler that a method does not return any data--if we wanted to write a method that outputs some text, for example, we would instead use the "string" keyword to tell it that the method returns text.
The first thing we want to do is get a list of all the files and folders on the desktop. This is an important step because there are some things on the desktop, such as the recycle bin and My Computer icon, that we do not want to remove. So I'm going to insert a static method above the "main" method called "getListOfFileNames" that will make a text file containing the file names for all the folders and files on the desktop (we aren't returning any values here, so the return type is "void"). Here's my method:

Our code does not yet do anything. That's because when we execute the code, the computer starts inside the "main" method follows all instructions inside the "main" method in order from top to bottom, then closes the program. Thus, we need to insert "getListOfFileNames();" into the "main" method like so:

Provided that you used the code above and correctly specified the file paths, there is now a file on your computer listing all of the files and directories on your desktop. Open it and copy all of the names for the files and folders that you want to remain on the desktop into Visual Studio, and save them to a string array called "prohibited"--these will tell our program to skip these protected files:

Next, we will add four statements inside the main method. The first three tell the computer to grab all of the file information for all the files and directories on the desktop and save them to a list, while the forth removes the protected files discussed above from that list:

As we did before with getListOfFileNames, create a new method inside the "program" class but before the "main" method. We will call this one "createDirectory" and it will take one argument of the "int" type, and will return a string value:

But again, we need to call this method from inside "main." Before when we did that the method did not return a value, but this time is different--when we call the method it will both create the folder in My Documents and return the name of the folder which we want to save to a variable in "main." Also unlike before, this method needs an input argument of the int type, so we will pass the integer 1 as the input. We do all that at once by writing the statement string folderName = createDirectory(1); This passes 1 to the method, tells the method to execute, and saves the text returned by the method to a variable called "folderName." But we won't just insert that statement directly into "main"--we don't want to create the directory unless their are files to copy, so we will put the statement inside an if statement--if there are any files to copy, then call the method, otherwise do nothing. The condition to check here is desktop.Any() which returns true if the list "desktop" has at least one element, and false if it is empty. While we're inside this conditional, we'll go ahead and move all the files as well:

All together, this is the whole program (you can download it here):
using System;
using System.Collections.Generic;
using System.Linq;
using System.Text;
using System.IO;
namespace cleanDesktop
{
class Program
{
static void getListOfFileNames()
{
//create a list variable where we will store all the file information
List<FileSystemInfo> desktop = new List<FileSystemInfo>();
//add all of the file information to the list
desktop.AddRange(new DirectoryInfo(@"C:\Users\username\Desktop").GetFiles());
//add all of the folder information to the list
desktop.AddRange(new DirectoryInfo(@"C:\Users\username\Desktop").GetDirectories());
//create a list variable where we will store all of the file names
List<string> allFiles=new List<string>();
//loop through all of the files in our "desktop" list and save their names to the "allFiles" variable
foreach (var file in desktop)
{
allFiles.Add(file.FullName);
}
//save all of the file names to a text file on the desktop
File.WriteAllLines(@"C:\Users\username\Desktop\allfiles.txt", allFiles);
}
static string createDirectory(int numberOfTries)
{
//place to store the name of the folder we are creating
string outputName = @"";
//get the current date which we will use to name our new folder
DateTime currentDate = DateTime.Now;
//create a text string that will be the path & name of our new folder
//the folder's name will look like "moved from desktop on DD/MM/YYYY" with the date being the day the files were moved
string newFolderName = @"C:\Users\username\Documents\moved from desktop on " + currentDate.Day + @"-" + currentDate.Month + @"-" + currentDate.Year;
//we don't want to overwrite a directory if it already exists, check if it exists
if (numberOfTries == 1 && !Directory.Exists(newFolderName))
{
Directory.CreateDirectory(newFolderName); //if it does not exist, create it and save this name to outputName
outputName = newFolderName;
}
else if (numberOfTries > 1 && !Directory.Exists(newFolderName + @" (" + Convert.ToString(numberOfTries) + @")"))
{
//if it does exist, construct a new name with (2) at the end.
Directory.CreateDirectory(newFolderName + @" (" + Convert.ToString(numberOfTries) + @")");
outputName = newFolderName + @" (" + Convert.ToString(numberOfTries) + @")";
}
else
{
//if that also exists, we increment from (2) to (3) etc & try again until we find a folder that doesn't exist
createDirectory(numberOfTries + 1);
}
return outputName; //return the name of the directory we just created
}
static void Main(string[] args)
{
//instruction telling the computer to go to getListOfFileNames and execute that code before continuing
//getListOfFileNames();
//store list of files that you don't wan the program to touch
string[] prohibited ={@"C:\Users\username\Desktop\Clarity Data Dictionary - Epic 2012 IU4.chm"
,@"C:\Users\username\Desktop\desktop.ini"
,@"C:\Users\username\Desktop\Epic.lnk"};
//initialize list to store all the file info in
List<FileSystemInfo> desktop = new List<FileSystemInfo>();
//add all the desktop files to the list
desktop.AddRange(new DirectoryInfo(@"C:\Users\username\Desktop").GetFiles());
//add all destop folders to the list
desktop.AddRange(new DirectoryInfo(@"C:\Users\username\Desktop").GetDirectories());
//remove the protected files from the list
desktop.RemoveAll(f => prohibited.Contains(f.FullName));
if (desktop.Any()) //execute only if there are some files to move
{
string folderName = createDirectory(1); //create the folder and save it's name here
foreach (var file in desktop) //iterate over all the files to be moved
{
if (Directory.Exists(file.FullName))
{
//if the file is a directory, move the directory
Directory.Move(file.FullName, folderName + @"\" + file.Name);
}
else if (File.Exists(file.FullName))
{
//if the file is a file and not a directory, move the file
File.Move(file.FullName, folderName + @"\" + file.Name);
}
}
}
}
}
}

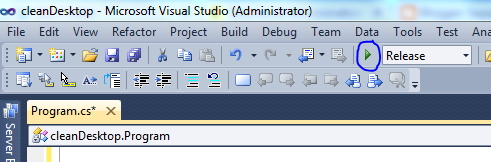
Ok, the program works now. We're down to the final steps. First, build the release version by selecing "release" and going to Build->build cleanDesktop in the menu:

The final step is to schedule the task to run weekly. The task scheduler can be found by going to the control panel->system and security->administrative tools->task scheduler on the right side select "create basic task." Go through the wizard and when you get to "which action do you want to perform" select "start a program" and the next screen will ask for the file path to the program. Click browse and navigate to your application. If you chose the default directory setup when you created the solution for the program in Visual studio, this will be in My Documents->Visual Studio 2010->projects->cleanDesktop (or whatever you named it)->cleanDesktop->bin->release->cleanDesktop.exe. The direct filepath should be similar to "C:\Users\username\Documents\Visual Studio 2010\Projects\cleanDesktop\cleanDesktop\bin\Release\cleanDesktop.exe" with that file selected click next and on the next screen check "open the properties dialogue..." and click finish. When the properties dialogue opens, go to settings and check the box "run task as soon as possible after a scheduled start is missed"--your computer has to be on for the task to run, so if your computer is off at the scheduled time this will cause it to run the task as soon after that time that the computer is on.
Congratulations! Your desktop will never be cluttered again!